
How to Stain a Wood Veneer Table Top
This post may contain affiliate links which means I make a commission if you shop through my links.
Disclosure Policy

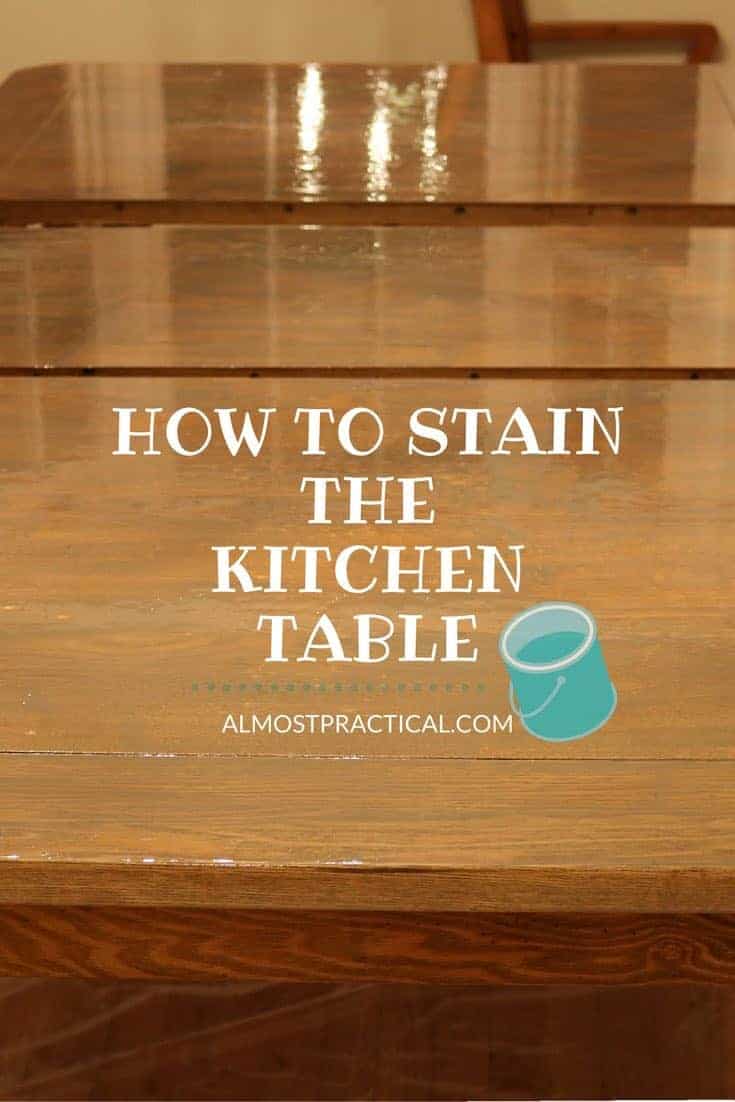
The next step in my table refinishing project is staining the kitchen table top.

Up until now, I made a plan and then used furniture refinisher to remove the old varnish.
Today, it is time to add stain.
From what I understand, it is easier to make wood darker with stain, but my goal was to lighten it up as much as I could.
Materials List:
- Minwax Wood Finish in Weathered Oak
- Helmsman Spar Urethane by Minwax
- a natural bristle paintbrush like this one from Purdy
The Product
I belatedly realized that my table top was not solid wood but actually a veneer. This was a challenge because I could not sand it down much during the prep phase.
And now, I was a little worried that the wood stain would not really take. The surface did not seem too porous and absorbent to me.
I had chosen Minwax Wood Finish in Weathered Oak for my staining product. This is an oily, viscous liquid that you spread on the surface, let sit for between 5 and 15 minutes so the wood can absorb the stain, and then wipe off.
If the stain is not as dark as you want, you can reapply.
Why Weathered Oak?
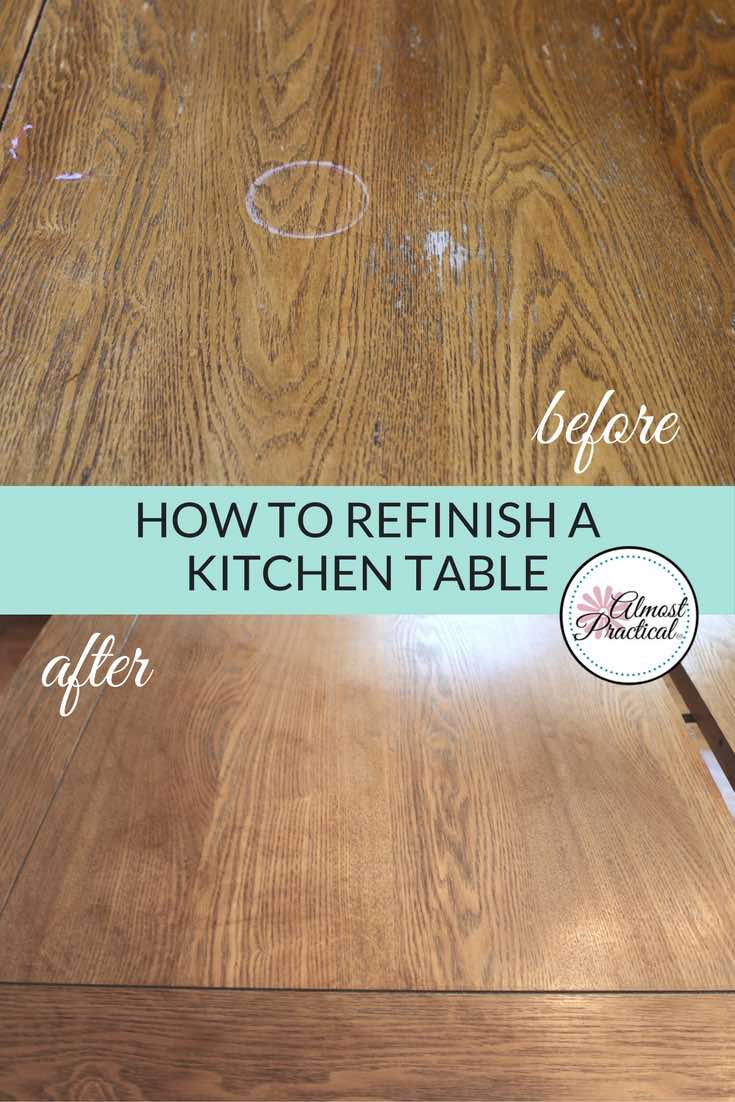
Before staining the kitchen table top, it wore a reddish oak stain which, in my opinion, looked dated and darkened up the room.
The color also clashed with all of the other wood surfaces in the area – wood floors, a wood buffet, and wood counter stools.
I wanted to keep the wood table top but paint the table legs and chairs.
To make the it less garish, staining the kitchen table top in a lighter color made sense. But I did not want to go the Pickled Oak route because I wasn’t sure how much stain the wood would absorb – and I didn’t want it to look too pink.
The only other option that seemed a little lighter was the Minwax Wood Finish in Classic Gray. But I thought that this could turn out to be too gray and actually look darker in the end.
Minwax has a water based stain and also their Polyshades but I wanted the wood grain to show through. In all honesty – I am not familiar enough with wood stains to understand what results I might have gotten on a previously stained veneer with all of those different products.
The Application
I applied a heavy layer of the wood stain to the table top with a foam brush. As you can see in the photo below, the stain went on thick and separated a bit.
Let me tell you, this stuff has a really strong smell. We opened all of the windows in the area – since I was staining in place. If you can do your piece in a well ventilated garage or separate space it is probably best. The fumes really do permeate the whole house.
I left the stain on for 15 minutes and then wiped the excess off with a clean rag.
It is important to wipe off all of the excess and not let it sit or dry on the surface. If you leave too much on the surface will stay tacky and sticky to the touch.
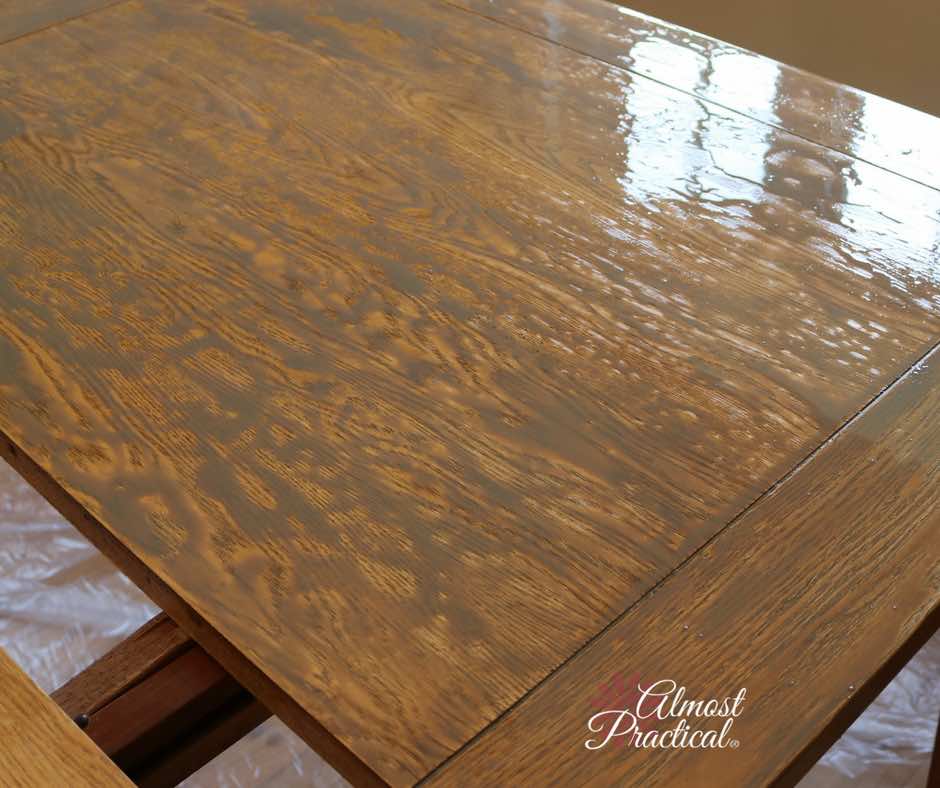
I followed the instructions on the can and when the surface was dry I did one reapplication. The second coat of wood stain went on much more smoothly – you can see it in the very first photo at the top of this post.
Sealing it Up
Once the wood stain was completely dry – I applied three coats of Helmsman Spar Urethane by Minwax to seal it up.
I chose the Helmsman Spar Urethane primarily because the website says that this product is good for kitchen countertops – and my kitchen table gets a ton of use and abuse.
I also did not choose the water based option because so many online reviews say that a water based finish in general is not as durable as an oil based finish.
Following the instructions on the can – I used a natural bristle paintbrush like this one from Purdy to apply and waited for each coat to dry and lightly sanded in between coats.
It is so important to clean your brush right away or you might ruin it. The urethane dries fast and will harden up your brush in no time. I used mineral spirits to clean my brush.
I would have liked to apply a few more coats but the family was itching to use the table and get the kitchen back to normal again.
The End Result
In the end, I was very happy with the color of the kitchen table top.
It is definitely lighter – especially when you compare it to the chairs which I have not painted yet.
The kids say – “it looks the same” – but I see the differences.
Obviously, it is the same table, so it will look similar to how it looked before. But the surface is cleaner, brighter, and lighter.
Your Ideas for Staining the Kitchen Table
Tell us what you learned from your project in the comments below.
I used this same procedure when I recently reupholstered an old bench – see the DIY tutorial here.
Pin It


How has your finish held up to cleaning and wiping the table? I redid my table a few years ago and I’m having to do it again because the wax I used didn’t protect my stain and now it looks worse than it did.
Hi Adrienne,
I have actually been pleasantly surprised with how well the finish has held up. It’s been a few years now and it still looks great. This is our only table (we don’t have a dining room) so it sees heavy use and we definitely don’t baby it.
It’s a bummer about your table. I have used wax on other projects as opposed to the Spar Urethane on this table top, and I find that wax does not stand up to heavy wear and tear as well, but that could just be my experience.
Thanks for stopping in!
Dear Neena, I made the mistake of trying a wood gel stripper, and gouged the table top of wood veneer. I sanded out the gouge, but now I am unsure how to add faux wood grain lines and if I do thst, what product do recommend? Should I fix the lack of veneer design before I start staining?
Hi Patricia,
How frustrating! Refinishing wood veneer is so difficult. I am not really sure how you would go about fixing a patch – if the veneer is actual wood, you could try to match it with a piece from the lumber store. If not – this technique of stain over paint may give you some ideas as well (read to the middle of the article to see the technique) http://homewithlo.com/blog/refinishing-a-table-top.
Good luck with it!
Hi Neena – so you put the stain right over the old table and it cleaned up the white marks?
Hi Kathleen,
No – not at all. I wish it were that simple.
I first stripped off the old stain and varnish – you can see the process I used in this article: https://almostpractical.com/furniture-refinisher-tips/
Honestly, refinishing wood is one of my least favorite DIY projects. But I love the results!
What project are you working on?