How to Paint a Mirror Frame – An Easy DIY Home Decor Project
This post may contain affiliate links which means I make a commission if you shop through my links.
Disclosure Policy
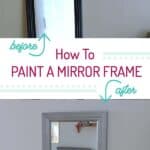
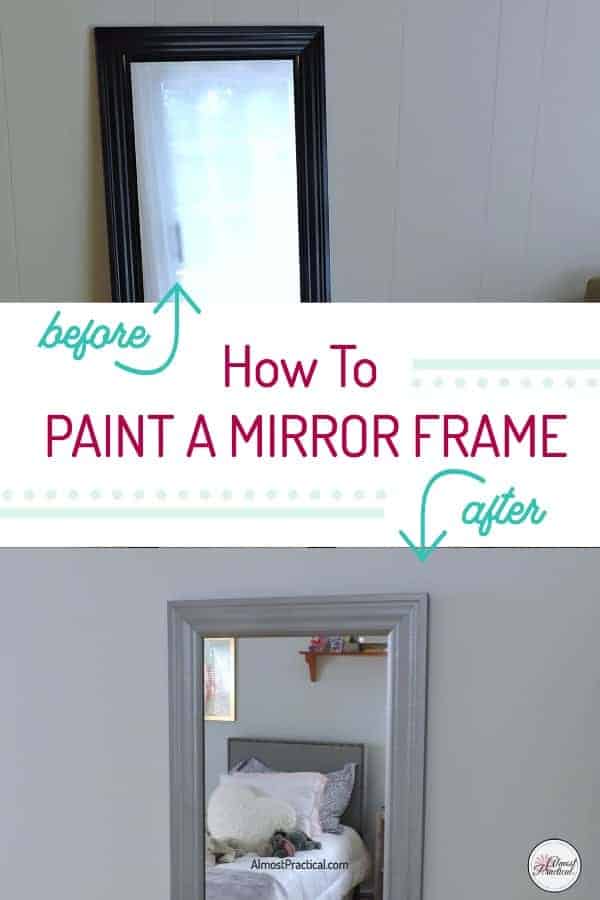
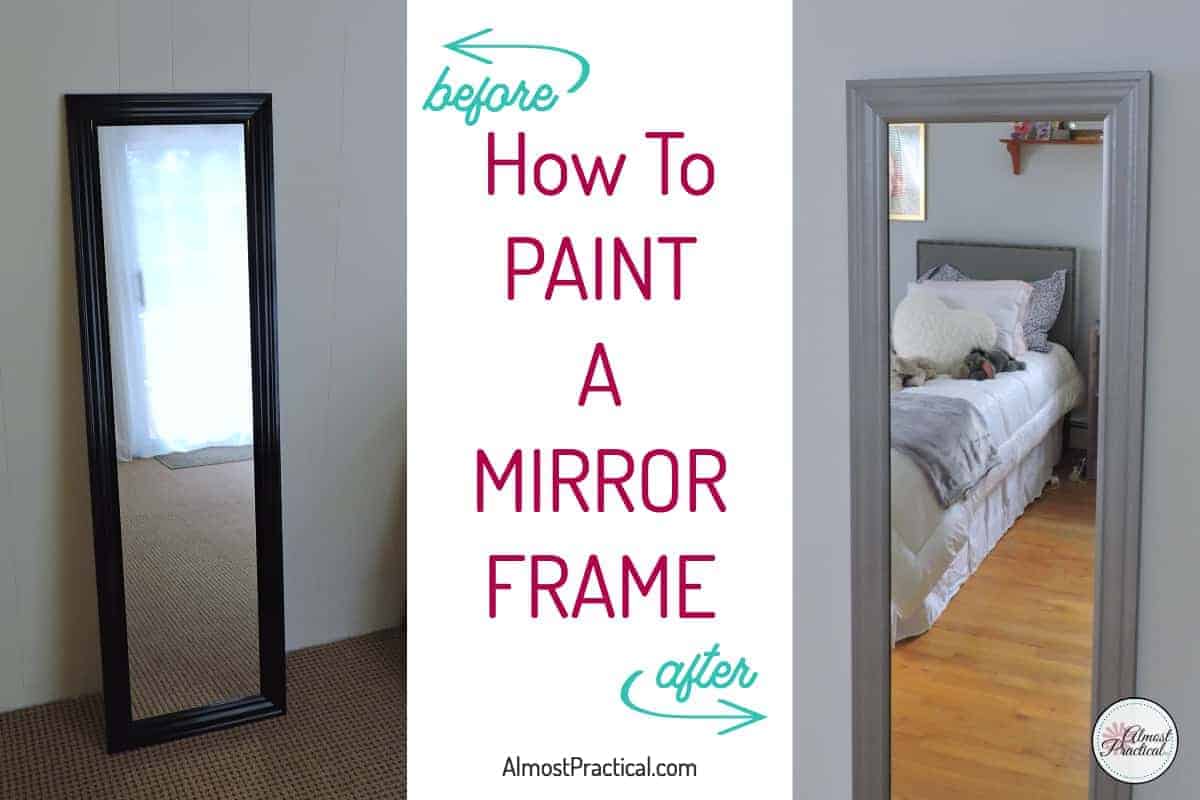
This tutorial on how to paint a mirror frame is so easy and it can transform an inexpensive mirror into a work of art.
The month of September in our house has seen a bit of “musical rooms”. Two of my sons left for college. And my daughter saw a huge opportunity to claim the bigger bedroom that the boys had shared.
Actually it made a lot of sense and it also gave us a chance to declutter and organize many years worth of stuff.
It took many weeks but slowly we made the transition.
Once my daughter was nestled in her new digs, one of the things she needed was a full length mirror – because all teenage girls need a full length mirror, apparently.
Now, we just happened to have an extra one of those lying around.
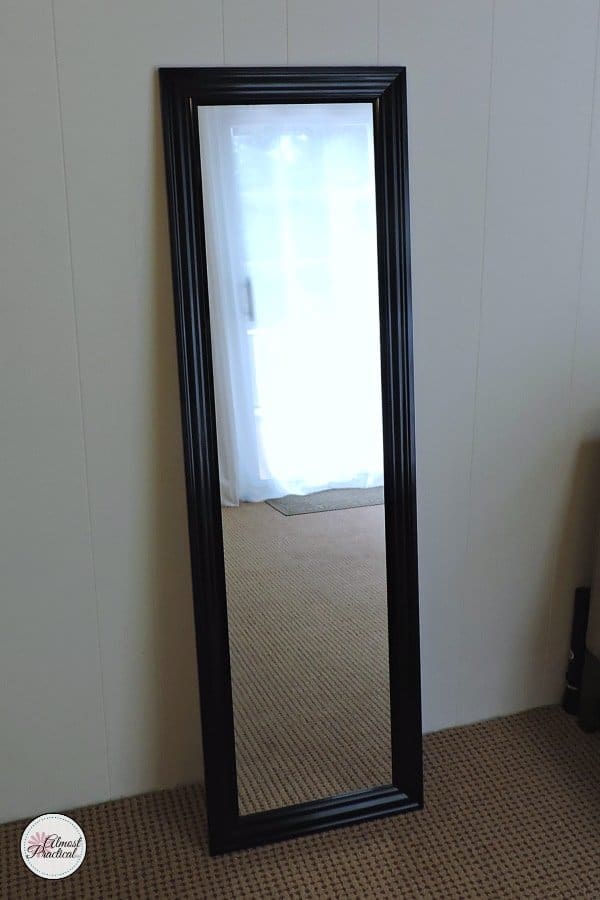
My son had bought an inexpensive over the door type full length mirror for his college dorm in years past and left it at home. In fact, I think it might have even been this exact one in black.
I guess he didn’t need it.
It would have worked fine but the mirror frame was a cheap looking shiny black plastic.
But I really didn’t want to buy a new mirror, since we already had one.
So, I decided to do a little home decor DIY and see if I couldn’t do something to make the mirror pretty enough to put in my daughter’s room.
What You Will Need for this Home Decor DIY
Here is your materials list:
- If you don’t already have one – you will need an inexpensive full length mirror, like this one
- One can of spray paint in the color of your choice – I used this Rust-Oleum Hammered finish paint
- A comfort grip for your spray paint can to make application easier
- Picture hanging hardware, if your mirror doesn’t already have it
- Painters tape and old newspapers
- A strong dropcloth or flattened cardboard boxes for your work surface
- Work masks so you don’t inhale any paint particles
How to Paint a Mirror Frame With Spray Paint
Now, I am a complete DIY novice.
I tinker around a lot – and some stuff works out nicely while other projects fall completely flat.
My first thought for painting this mirror frame was to use spray paint.
Keep in mind that I have only spray painted a few small things in my life.
But, I thought that I could probably get a fun finish and revamp the mirror.
My main concern was that the mirror frame was a shiny plastic.
Would the paint adhere well to such a smooth surface?
Well, two things made me decide to go full steam ahead:
- the mirror was fairly inexpensive to begin with
- it’s wasn’t like this is a table or something that gets a lot of wear and tear. It’s a mirror frame that is going to hang on the wall and probably won’t be touched really.
I figured – what do I have to lose?.
Picking the Paint
My first step in this project was to head over to Lowe’s to pick the spray paint for the mirror frame.
I wanted something sort of silver metallic with a bit of texture.
What I found was this Rust-Oleum Hammered textured spray paint.
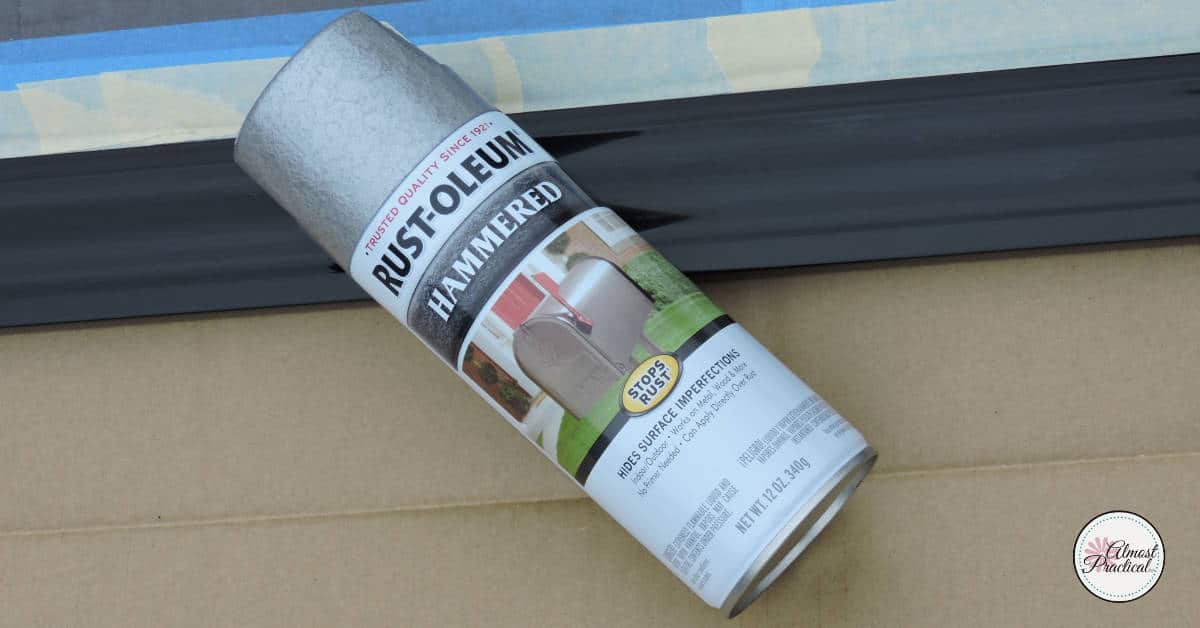
It says right on the front of the can that it
- hides imperfections
- works on metal, wood, & more
- no primer needed.
Notice that it does not mention plastic anywhere?
Well, I decided to go with it anyway.
Prep The Mirror
The next step in this project of spray painting a mirror frame was to install some hanging hardware.
You see, this was designed to be an over the door mirror – so it came with over the door hooks and no hanging brackets.
I happened to have one of this type of picture hanging hardware at home – so I decided to install that first because I did not want to take a chance on scratching the finished paint.
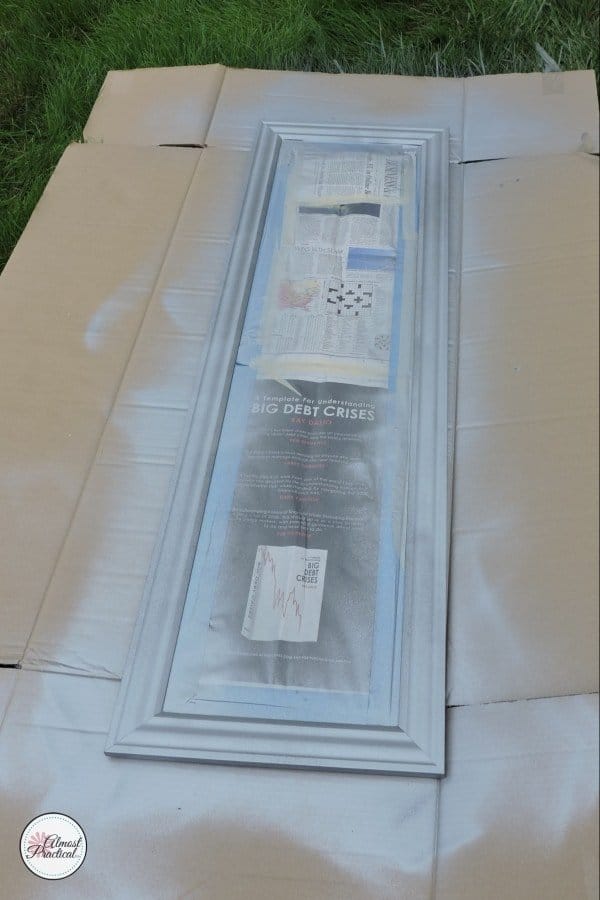
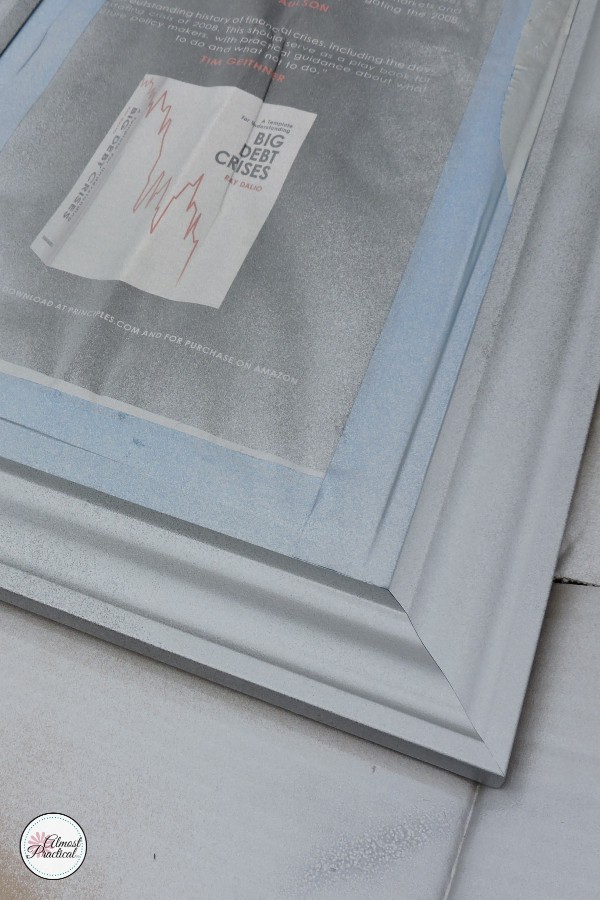
Next, I took several layers of newspaper and covered the mirror from edge to edge – just leaving the frame exposed. I secured the newspaper to the mirror with painters tape.
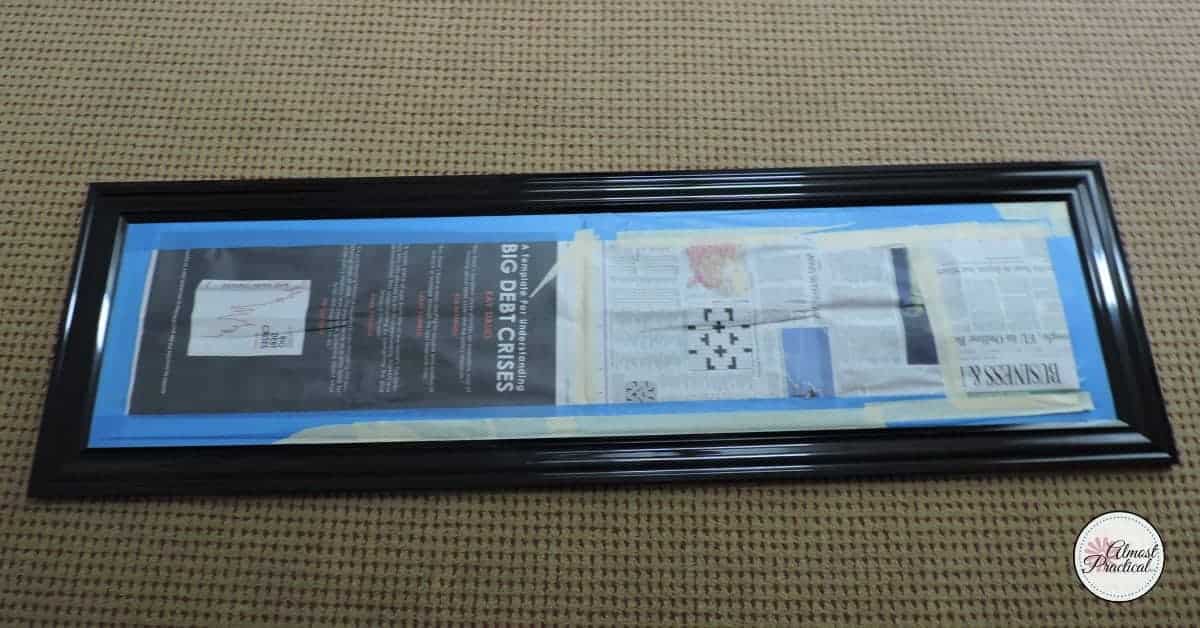
If your mirror frame is made of wood then you might want to lightly sand the piece with a super fine grade sandpaper to give the surface some “teeth” to hold the paint better.
My mirror frame was plastic so I did not sand it at all as this would have created visible scratches in the surface.
Finally, make sure the mirror frame is clean, dry, and free from dust.
Prep Your Work Surface
The thing about spray painting a mirror frame on a full length mirror is that you need a fairly large work surface.
Unless you have some kind of large warehouse or workshop, I would recommend that you do any spray painting outside.
I painted my mirror out on the front lawn, so I needed something to place under the mirror to protect it and also the grass.
Luckily, we had just bought this gorgeous mirrored vanity for my daughter’s room as well – and it came in a pretty big cardboard box. So, I just laid that flat as my work surface.
If you don’t have a cardboard box that is big enough, you could use a heavy dropcloth. If you go this route and you paint out on the lawn, you might want to elevate the mirror on bricks or styrofoam blocks so you get an even coat around the edges.
Time to Paint
Once I had my work surface all set – it was time to get started.
First I put on my very fashionable work mask to protect myself from inhaling all those paint particles flying around.
I had read that you need to apply several light coats of spray paint in a wide sweeping motion if you want to get a good even coverage.
So, that is what I tried to do.
Everything started off well enough for the first coat.
I waited a few minutes to let that dry and then went on to apply another coat.
But then things sort of got muddled.
I am not a very patient person, so waiting between coats was not working for me to well. I just sort of kept working my way slowly around the mirror, applying paint to areas that I felt needed a bit more coverage.
As the paint can emptied, something unanticipated happened.
Drips!
The nozzle started to drip. Ok – all of you experienced spray paint DIY mavens are probably having a good hearty belly laugh at my expense.
But, seriously, I was surprised.
And the thing is that I didn’t realize this was happening right away, so I ended up with drips on my newly painted mirror frame.
Fortunately, I was able to blot them a bit and repaint those areas to make it look good enough.
Perhaps I should have gotten one of these comfort nozzle thingy-do’s.
Not sure if it would have helped with the drips, but I must admit that my trigger finger was getting tired towards the end. Maybe next time.
Let the Mirror Frame Dry

Even though I don’t have the most patience when it comes to DIY, I totally recognized the importance of allowing for final drying time.
This was especially important because I was already worried about the paint adhesion being that the frame was a shiny plastic.
I simply dragged the cardboard with the mirror on it into the garage and let it sit for a few hours.
At this point I carefully removed the newspaper and painters tape from the front of the mirror.
The instructions on the paint can say to let the paint cure for about 48 hours before use.
Since this was a mirror that was going to hang on a wall, I went ahead and hung the mirror up at the end of the same day even though it wasn’t even nearly 48 hours.
I figured the mirror would be safer on the wall than on my dusty garage floor.
And that’s it!
Project complete.

The mirror frame looks great and the paint seems to be holding up well even on the plastic.
Save this tutorial on How to Paint a Mirror Frame to your favorite board on Pinterest to refer to later.