How to Make Instant Pot Yogurt
This post may contain affiliate links which means I make a commission if you shop through my links.
Disclosure Policy

As an Instant Pot owner, you will want to learn how to make Instant Pot yogurt. It is so good, you may never buy it from the store again.
And it’s really fun to tell people that you make your own yogurt. For some reason they always seem a bit surprised – I guess making homemade yogurt is not a common thing.
Making yogurt in the Instant Pot is fairly easy, but it does take some trial and error. By now you have probably realized that anything you make in the Instant Pot requires some trial and error – but that is part of the fun.
I am writing this post to tell you what worked for me, and hopefully help you along on your yogurt making journey.
Let’s Start With the Instant Pot
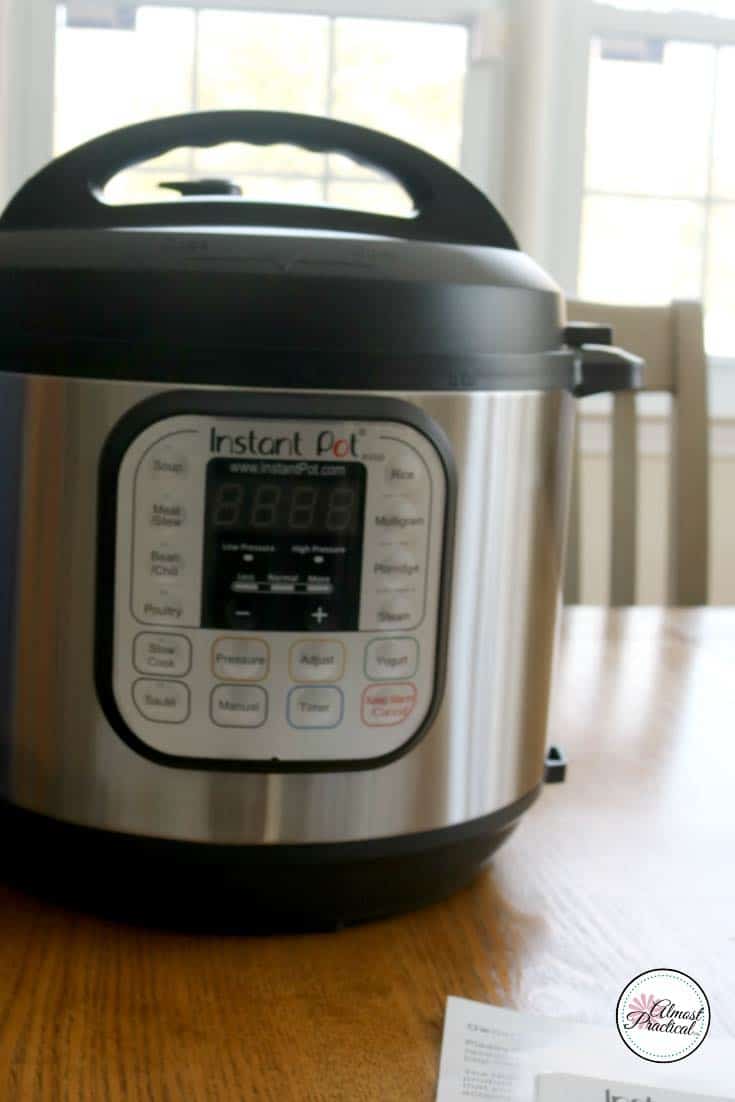
Since there are quite a few different Instant Pot models out there, I will start by telling you what models I have (yes, I have more than one – 3 to be exact 😉 ).
Currently, I am the proud owner of:
- 2 Instant Pot IP DUO60 models (these hold 6 quarts), and a
- Instant Pot IP DUO mini (this holds 3 quarts)
I have made Instant Pot yogurt in both models and they both work well.
Personally, I use a half gallon of milk to make a batch. The IP DUO mini fits this amount perfectly. A half gallon of milk/yogurt will fill the IP DUO60 about half way which is fine as well.
You can actually use a whole gallon of milk in the IP DUO60 6 quart model – but for some reason my Instant Pot yogurt comes out a bit more watery if I use a whole gallon (more trial and error needed, I guess).
Let’s move on to other items you will need.
Other Equipment Needed to Make Instant Pot Yogurt
Obviously, your Instant Pot will be your main tool. But you will need a few accessories to make yogurt.
None of these are absolutely necessary but they make the process easier – so pick what makes sense for you.
- wire whisk
- instant read thermometer
- yogurt strainer
- an extra silicone ring
- cooling rack
- 1/4 cup measuring cup
Ingredients for Instant Pot Yogurt
You might be surprised to learn that Instant Pot yogurt only has two ingredients.
- milk
- plain yogurt
You read that right, you do need a small amount of plain yogurt to introduce the yogurt cultures into the milk. But I am getting ahead of myself.
Related: Be sure to check out our Instant Pot Gift Guide here.
Let’s Talk Milk
I mentioned before that my Instant Pot yogurt comes out best if I make it with a half gallon of milk.
Typically, I use what we used to call 2% (percent) milk which is now referred to as “Reduced Fat Milk”.
It doesn’t matter what brand but DO NOT BUY anything that is ULTRA pasteurized.
Regular, plain old “pasteurized” is what you need.
I can’t give you scientific specifics but somehow the ULTRA pasteurization process does something to the milk that causes the yogurt to not come out very well.
Some people use raw milk – but I know nothing about that, so you may need to come up with your own recipe or find one specifically designed for that type of milk.
Let’s Talk Yogurt
You will need a small amount of plain yogurt to start your Instant Pot yogurt.
I use Dannon Non-Fat plain yogurt for this.
The brand you use is not as important as making sure that it contains live, active, yogurt cultures. (It will tell you this on the ingredient label.)
Also, use plain yogurt, not vanilla or any other flavor.
You can probably use plain yogurt with a different fat content, but I have always used non-fat.
Prepare Your Space
Your Instant Pot
To make Instant Pot yogurt, I use my Instant Pot just as it is.
You may read that some people sterilize the inner pot or heat water in it before they make the yogurt.
I don’t do this.
The theory (I am guessing here) might be that when you are making yogurt, you are creating a warm environment in which the yogurt cultures can multiply. I know that doesn’t sound too appetizing – but that is what yogurt is, even the store bought stuff.
I suppose in that toasty warm environment, other things can grow as well. But I have chosen not to think about it too much.
Since I don’t sterilize the whisk or the thermometer, I figure there is no point to sterilizing the Instant Pot insert, either.
But that’s just me. It is best to do what makes sense for you.
If you use your Instant Pot regularly to make strongly flavored food, you may find that the silicone ring has taken on a strong odor.
When making yogurt, you can switch this out with a fresh ring that you only use for making more bland type dishes.
A Large Plate Helps
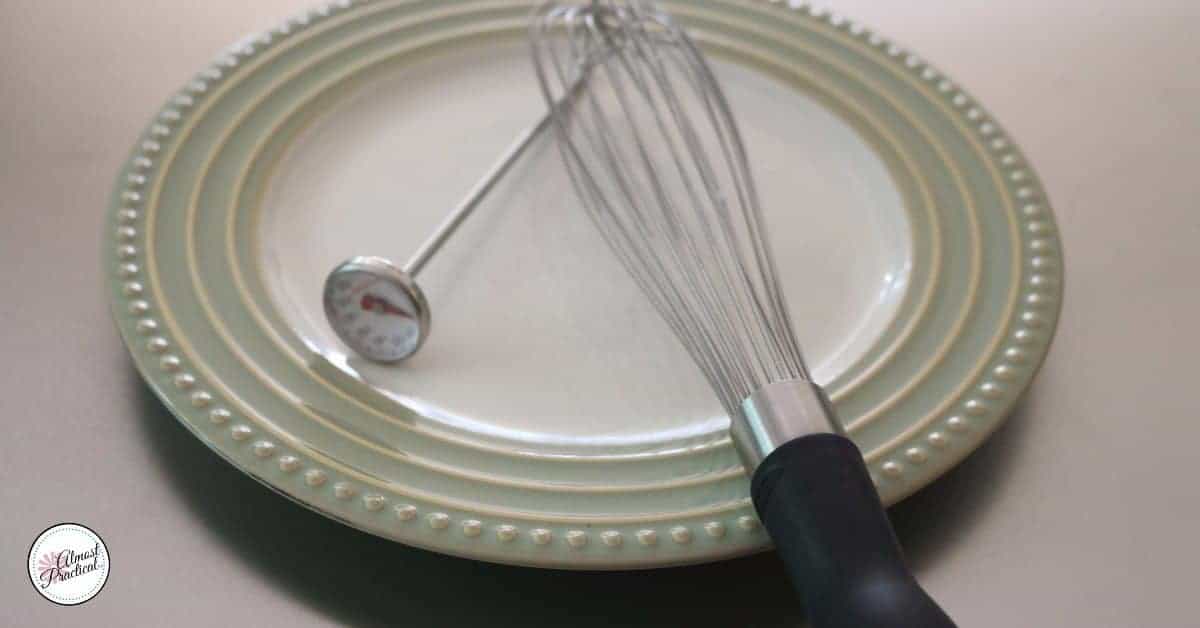
I keep a large dinner plate next to the Instant Pot when I make yogurt to use for my working space.
I place the whisk, the thermometer, and any other utensils I might be using here.
You will find that when you stir the milk you will end up needing a landing spot for your tools.
A Cooling Rack
Place a cooling rack near your Instant Pot as well. This is where you will place the stainless steel inner pot when you cool the milk.
Related: Read my Instant Pot Review here.
The Process

Before we get started, let me explain the process of what is going to happen.
You will use your Instant Pot to boil the half gallon of milk.
Then, you will remove the insert from the Instant Pot and let the milk cool to about 100 degrees Fahrenheit.
You will mix about a quarter cup of plain yogurt into the cooled milk.
Next, you will place place the insert back into the Instant Pot and start the yogurt function.
This will take from 8 to 10 hours.
When the time is up, you should have yogurt but it will be warm.
Put the insert in the refrigerator for a few hours to cool.
If you want a thicker yogurt, you can then strain the yogurt for a while.
And that is it.
Are you ready?
Let’s Make Yogurt
Boil the Milk
The first thing you will do is pour the entire half gallon of milk into the stainless steel insert in your Instant Pot.
Close and lock the lid with the valve in the closed position. Yogurt making does not require the pressure cooking function of your Instant Pot but I just close the valve to theoretically keep the heat in.
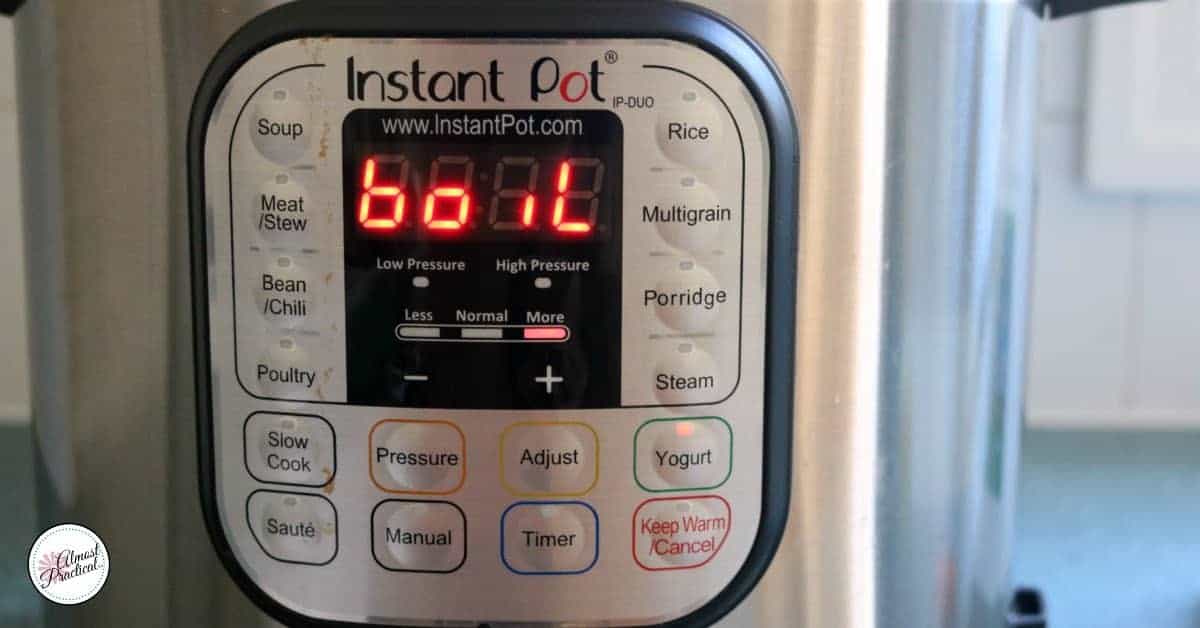
Plug in your Instant Pot and press the “Yogurt” button.
Your Instant Pot will probably start flashing a number on the display. (Remember that I use the IP DUO 60 or DUO mini – so the process with your model might be slightly different)
Press “Adjust” until you see the word “boil” flash on the display.
This will start the boiling process.
I always forget to time how long it takes for the milk to boil, but I think it is around half an hour.
The Instant Pot will beep when the boiling process is done and then the word “yogt” will show on the display.
Some people will tell you to take the temperature of the milk with an instant read thermometer at this point. Generally, it should be around 180 degrees Fahrenheit.
I have come to trust that my Instant Pot is doing it’s job right so I no longer take the temperature at this stage.
Cool the Milk
Next up – you need to cool the milk to about 100 degrees Fahrenheit.
At this point, I open the lid and remove the stainless steel insert from my Instant Pot.
I place the insert containing the hot milk on a cooling rack so the air can flow all around it and cool it down faster. Usually I give the milk a quick stir with the whisk at this point to evenly distribute the heat.
It can take over an hour to cool the milk, so you may want to set a timer to remind you to check on it or you could forget that you are in the process of making Instant Pot yogurt altogether. (Been there, done that.) Amazon Alexa is great at helping with this.
When the temperature of the milk is around 100 degrees Fahrenheit (between 100ºF and 105ºF seems to work best for me) you are ready to move to the next step.
But before you move on, do these 2 things.
First, feel the outside of the stainless steel inner pot with your hands. It should be warm but starting to turn cool. After you make the Instant Pot yogurt a few times, you will start to know by touch when the milk is the right temperature to move to the next phase.
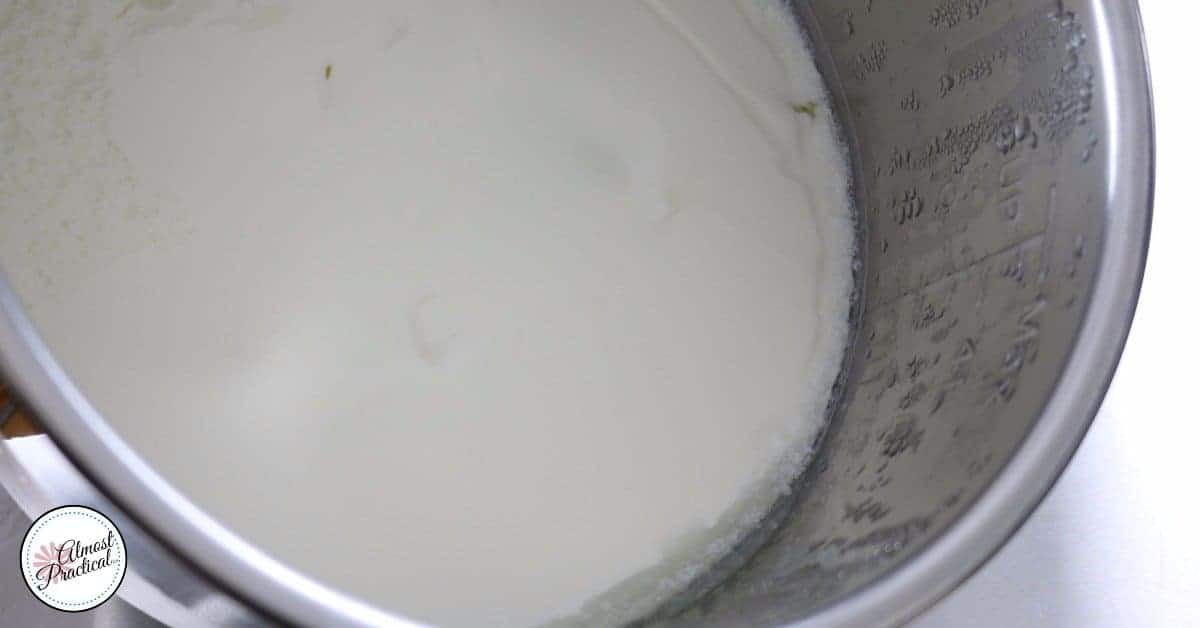
Second, a thick skin of milk should have formed on the surface of your pot of milk. Take a fork and discard this film (I place it right on that large dinner plate that I have set up as my work surface).
Add the Yogurt
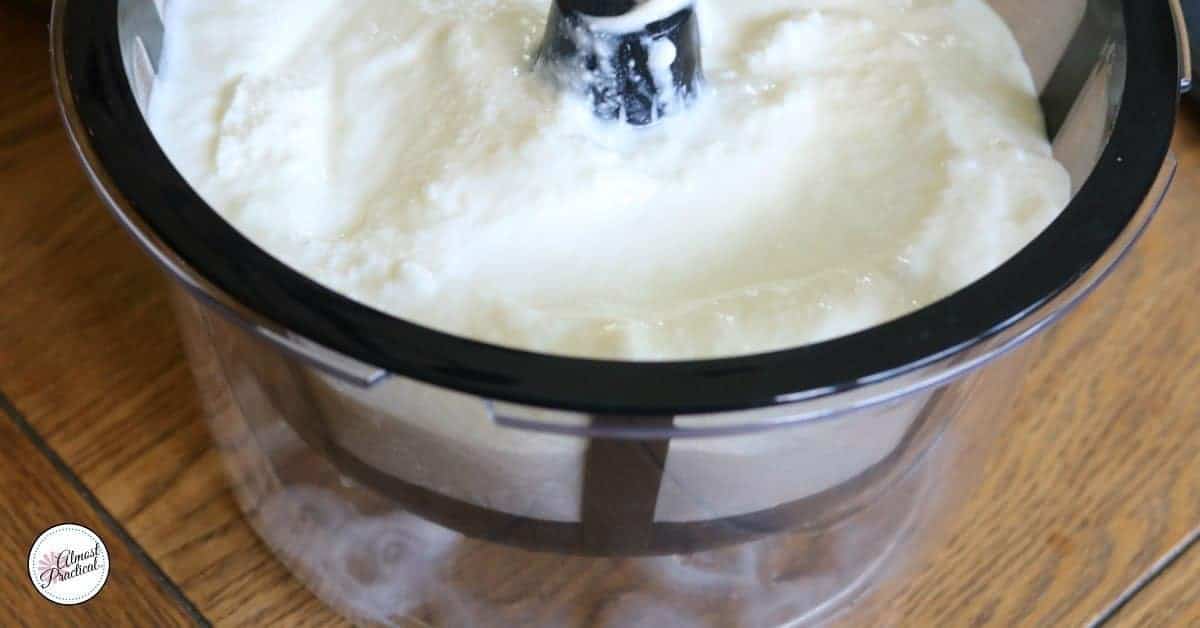
Now using a 1/4 cup measuring cup, take a heaping scoop of the plain yogurt and dump it into the cooled milk in your stainless steel inner pot.
Whisk the milk and yogurt gently until the yogurt is broken up and dispersed into the milk.
Yes, you can have lumps. No, do not over whisk or purposely make it really smooth. Just stir it in.
Some people recommend, ladling out a little cooled milk into a small bowl, adding the yogurt to this small portion, mixing it up, and dumping the mixture back into the bigger pot.
I have done this and for me, the Instant Pot yogurt turns out exactly the same as it does when I just add the plain yogurt directly into the bigger pot of milk and stir.
Your choice.
Start the Long Haul
Finally, return the inner stainless steel pot with the cooled milk and yogurt mixture back into the Instant Pot. Close the lid in the locked position with the valve in the closed position.
Hit the “Yogurt” button.
A number should show on the display and power level should be “normal”.
The number indicates the number of hours that the yogurt recipe will take.
(If something else, like the word “boil” shows up on the display, press “adjust” until you get a number of hours.)
Now press the “+” or “-” button to set the amount of hours that you want.
You will need a minimum of 8 hours and usually not more than 10 hours.
The longer you let the yogurt sit, the more sour it becomes.
Our family prefers yogurt made using the 8 hour setting but if you like really tart yogurt then maybe 10 hours is for you.
If you have never made Instant Pot yogurt before you could start with 8 hours and adjust the time to your taste on your next batch.
So, here’s the thing. You need to be home (or awake) when the yogurt cycle completes because you need to put it in the refrigerator.
Typically, I will either start a batch of yogurt early in the morning or after dinner.
If I start the yogurt in the morning, it will be done by the evening.
And if I start it after dinner, it will be done pretty early in the morning (you need to be an early riser for this!).
Make sure to plan for the finish before you start.
Let the Yogurt Set in the Fridge
When the yogurt cycle is complete, the Instant Pot will beep.
Remove the lid and the stainless steel insert from the Instant Pot – you should have a nice looking yogurt at this point. You will likely see some whey (aka yogurt water) in pockets at the top.
Cover the stainless steel inner pot with plastic wrap or an Instant Pot glass lid or one of these silicone thing do’s.
Stick the whole thing in the refrigerator for a few hours or overnight until cold.
Strain the Yogurt (Optional)
At this point it is your choice to eat the yogurt as is or strain it to make it thicker.
I have done both.
A strained yogurt is thicker and more like a greek style yogurt.
Thinner yogurt is just as good and also works great in smoothies or these strawberry yogurt popsicles.
If you choose to strain the yogurt, strainer made specifically for straining yogurt makes the job easier.
I use this one by EuroCuisine with the stainless steel mesh.
If you are not sure that you want to commit to a yogurt strainer you could start by using a cheesecloth or a cheesecloth bag to strain the yogurt and help you make your decision on the strainer.
How to Store Instant Pot Yogurt
Once the yogurt sets and cools down, you will want to remove it from the stainless steel insert so you can actually use your Instant Pot to make something else.
I store my Instant Pot yogurt in 16 oz wide mouth mason jars like these.
One batch of unstrained yogurt (made with 1/2 gallon of milk) fills almost 4 16oz mason jars. Strained yogurt will make less.
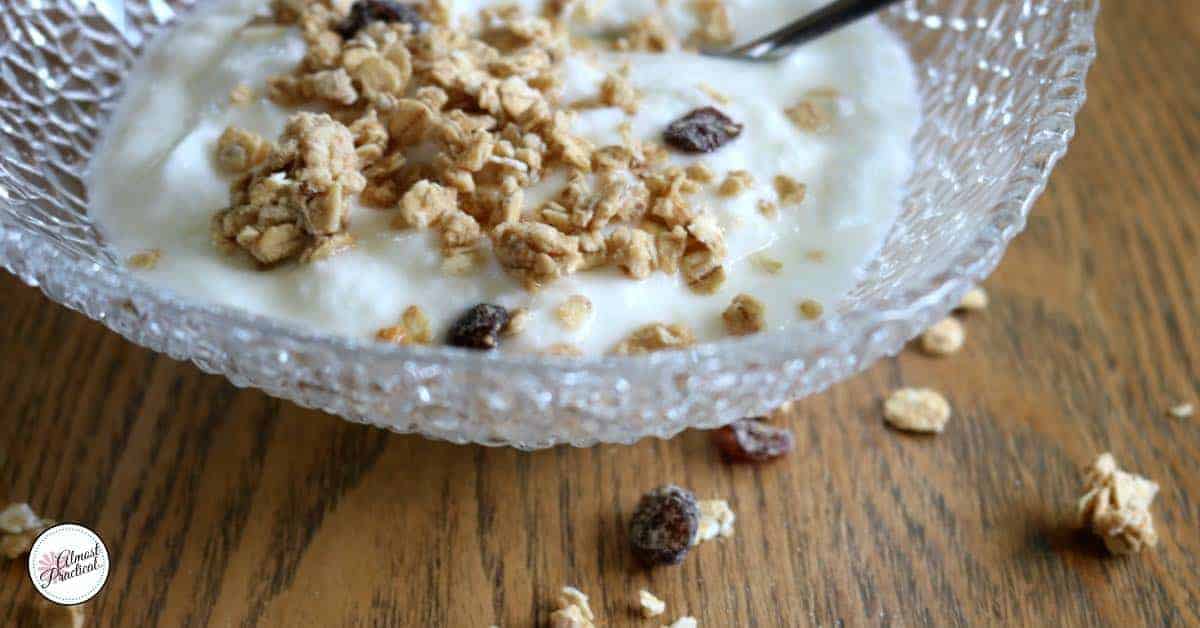
If you want to store the yogurt in individual servings, you could use a smaller jar. We like to serve our yogurt in bowls so there is plenty of space for fresh fruit and granola toppings.
It’s a Process but Not a Production
As you can see, making Instant Pot yogurt is a long process.
From boiling and cooling the milk to letting the cycle run it’s course to letting the finished yogurt set, well, it takes a long time.
But the steps are easy and the end result is so worth it.
Do you make yogurt in your Instant Pot? What’s your verdict?
Share your results in the comments below.
More Instant Pot Recipes You Might Like
Pin This Please


I use ultra pasturized organic whole milk exclusively to make Instant Pot yogurt. Works great. Thick and creamy
Hi Emily,
That is good to know – I will have to give it a try!