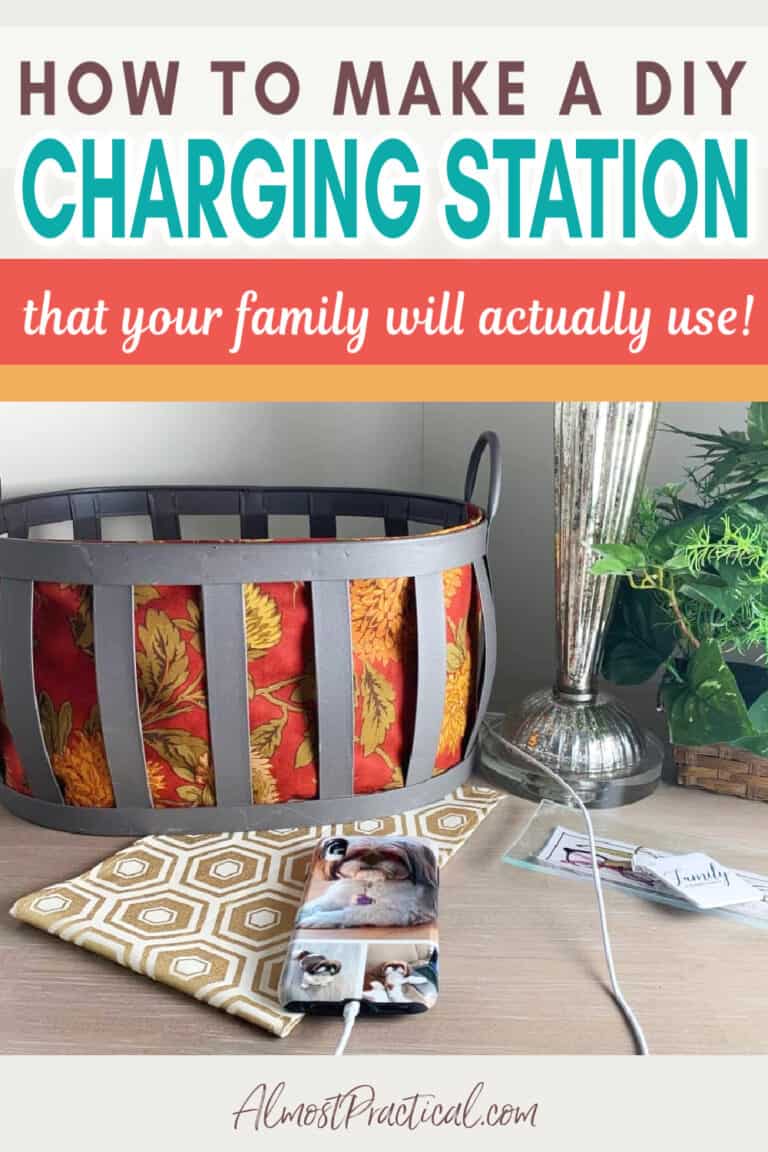
|

How to Use Foundation Paper for Piecing Quilt Blocks

This post may contain affiliate links which means I make a commission if you shop through my links.
 Disclosure Policy

My October 2020 Sew Sampler Box from the Fat Quarter Shop included something called Foundation Paper for piecing the quilt project of the month.

I had never used foundation paper for quilting before so I decided to create a few practice blocks before making my “official” blocks that I would include in the quilt.

Let me tell you that using foundation paper might just be my new favorite way to quilt. It is so easy!

I am going to describe the process for you here.

What You Need

quilting supplies needed to quilt with foundation paper

The primary thing that you will need is a tablet of foundation paper with a block pattern that you like.

I am using the 6 inch Courthouse Steps Foundation Paper from Fat Quarter Shop.

They have lots of other patterns here in both 6 inch and 12 inch block sizes.

You could also design your own templates with blank foundation paper here.

You will also need some standard quilting tools like:

Watch the Tutorial or Read Below

Cut and Separate Your Pieces

Follow the instructions in your foundation paper tablet and cut your material to the recommended size pieces.

These will all be larger than the actual placement on the foundation paper to allow for your seam allowances.

Start With Number 1 and 2

a piece of foundation paper for quilting in the Courthouse Steps pattern.

You will start with the spot numbered 1 on your foundation block.

Using your ruler, gently crease your foundation paper on the line between block number 1 and block number 2.

Flip your foundation paper over so the wrong side of the paper is facing up.

Take the corresponding piece of fabric for block number 1 and center it over the number 1 block on the wrong side of your foundation paper. The right side of your fabric should be facing up.

If you are having a hard time seeing through the foundation paper (since the wrong side is facing up and lines are on the other side of the paper) you can do this work on a lightbox like this one from Cricut.

The block should be larger than

Now place piece number 2 right side down on top of your piece number one.

This is important!

You will actually be sewing on the right side of the paper and your fabric will be underneath the paper on which you are sewing.

At this point, you will somehow need to keep your blocks in place as you sew.

You can either hold them in place (I am not so talented), or you can pin them in place.

I have also seen a suggestion to use a glue stick to hold the number 1 square in place – and truth be told, I like this method best.

I just use a small dab and make sure that there is no glue in my stitching line because I don’t want to gum up my machine.

The risk is that the glue could possibly discolor your fabric – so always be sure to test things out if you are worried about this.

Then I pin the number 2 square to the number 1 square – right sides together. The pin goes through both fabric layers and the paper

Adjust Your Sewing Machine Settings

Now go to your sewing machine (I use a Bernina 475 QE).

Adjust your stitch length to a very short stitch – something like 1.5 or 1.2 mm.

Using a small stitch length will make it easy for you to tear away the paper when your block is complete.

You can also use a number 90 Universal needle or even a 90 Jeans needle to sew your block.

Sew On the Line and Trim

Turn your foundation paper over so that the right side of the paper is facing up.

Now sew on the line between square one and square 2.

Remove your block from the machine and head to your cutting mat.

Fold the paper so that the seam allowance hangs off the edge.

Using a quilting ruler and your rotary cutter, trim the seam allowance down to a quarter inch.

Rinse and Repeat

Now do the same with squares number 3 on up.

Don’t forget to trim the seam allowances down to a quarter inch!

This is important. If you leave the seam allowances too large, then the block won’t measure up correctly when complete.

Finish the Block

After you sew in the last piece of fabric turn the block over so the paper is on top.

Use a ruler and a rotary cutter to trim along the “trim” line on all four sides of your block to square it up.

Finally, rip the paper off the back and your quilt square is done.

Have you tried quilting with foundation paper? It is so easy and your blocks look so square and nice. Not only that your sewing lines come out really straight. This is how you do it.

Foundation Paper Makes Quilting Easy

I found that using foundation paper made quilting much easier.

My sewing lines were really straight and my blocks were very uniform.

The most common mistakes I made were forgetting to trim the seam allowances down to a quarter inch and sometimes sewing on the fabric side inside of the paper side out of habit.

If you want to try your hand at using foundation paper to quilt – take a look at the selection at the Fat Quarter Shop here.

Happy Quilting!

Similar Posts

Leave a Reply

Your email address will not be published. Required fields are marked *

This site uses Akismet to reduce spam. Learn how your comment data is processed.